No products
Accueil
-

DOME ACCEPTANCE STAMPS FOR WW2 GERMAN HELMET M35 ET Quist SE NS EF
German dome stamp '1937' for M35 ET...
9,90 € 12,90 €
Viewed products
-

Feldherrnhalle...
Feldherrnhalle swastika decalultra...
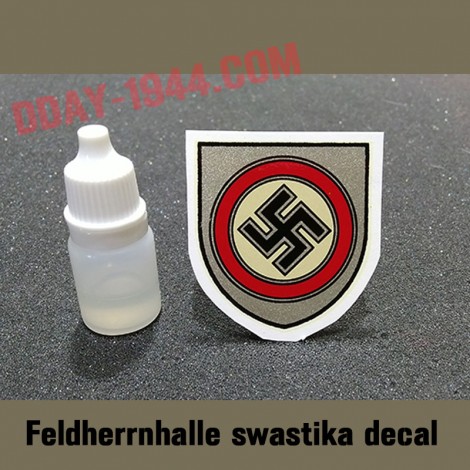
Feldherrnhalle swastika decal
FDW02HQ
Feldherrnhalle swastika decal
ultra high quality reproduction, background foil silver + white metal high effect, glue 'perfect replica' supplied.
available !!!
More info
Feldherrnhalle swastika decal + glue ’perfect replica’ (natural resin)
PREMIUM QUALITY
To date, we know 3 printing variants of the Feldherrnhalle decal. if the designs of the 3 variants are almost identical, the construction of the decal changes a little. You have here the replica of one of the 3 variants, the construction, superposition of the layers of inks is respected.
This series is designed specifically for those who make use artificial aging and decals. After aging , the result is astonishing , even under a loupe . After 5 years of research and testing , never such a quality of reproduction had been reached.
glue is free for the purchase of premium decal. if you order several decals you will receive 1 bottle containing the necessary dose of glue.
We also managed to remake the same one of the three glues that the Germans used in their plants for the installation of decals on helmets. This new adhesive ( natural resin ) ’perfect replica is offered with decals PREMIUM.
====== instructions for apply decal =======
This adhesive resin 'perfect replica' is exactly the same glue that was used for apply decals in factories of German helmets.
Materials needed: a small brush, water, a wet sponge, cloth and turpentine.
CAUTION do not confuse gasoline with turpentine and turpentine.
You need pure turpentine.

If you then want your old your decals, know that this is long glue to harden under the decal . Wait 7 to 10 days before the start aging, it's better.
1

You apply a thin layer of adhesive resin, do not be afraid to extend well beyond the dimensions of the decal.
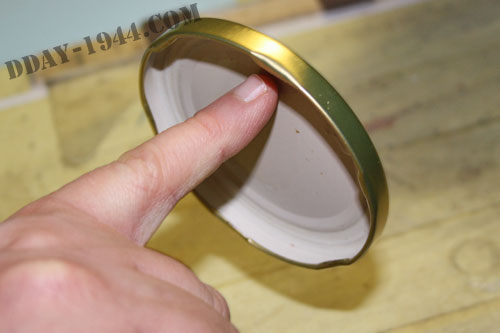
At the same time , you also put glue resin on any item, here a lid. It will serve as a witness to see when the glue becomes very sticky.
You also put the decal twenty seconds in water and then you put it flat.


===================================
2

We must apply the decal at the right time. The glue is a natural resin diluted with turpentine. When turpentine evaporates, the resin will become sticky.
The resin is sticky when put a little stronger finger. so you have to wait while evaporating the turpentine will make the resin more sticky, we see it if we put the finger without pressing.
Then the resin will become less sticky if the finger is placed, but she will remain tacky if the finger seconded above. it is at this point that we must place the decal.


With the help of the paper decal, plate the decal chasing any air bubbles and water.

You should get this result. The hardest part is done! You notice the excess glue around the decal. This is quite normal. For the moment we let the glue dry, we will remove it without problem in a few hours.
=====================================
3

After a few minutes, the glue is dried around, so we will remove it.
just pass a brush soaked in turpentine to dissolve the glue .
Then you place a wet sponge to clean.

A slight rub. Do not press too because do not forget the glue under the badge is still soft .

the final result: a perfectly applied decal, well bonded to the helmet and without any trace of glue.


